AC installation can be a daunting task, especially if you’re not familiar with the process. But AC installation doesn’t have to be difficult or time consuming. With a little bit of know-how and some basic tools, anyone can install an AC unit in their home or office quickly and easily. In this article we will cover all the steps necessary for AC installation so that you can do it yourself without any hassle.
AC Installation Basics: What You Need to Know
AC installation basics are important to understand before you begin the AC installation process. The most important step in AC installation is to make sure that your AC unit is compatible with the existing ductwork and power system. This means verifying that the AC unit’s wattage, voltage, and amperage are all within range of what your existing system can handle. Additionally, you need to be aware of any clearance requirements for the AC unit model you plan to install. This will determine the size of the AC unit as well as how much space it will require for proper operation and maintenance.
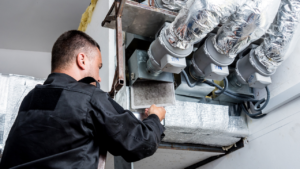
Once these steps have been taken care of, it’s time to start thinking about AC installation itself. AC units must be installed according to manufacturer guidelines, which generally vary from one AC model to another. Generally, AC units should be mounted on a level surface and secured with heavy-duty lag screws or bolts (depending on model). Proper ventilation is also an important part of AC installation; air needs to flow freely between the interior components and exterior environment in order for your AC unit to operate at peak efficiency. Make sure your vents are open and not blocked by furniture or other items in order for maximum performance from your AC unit.
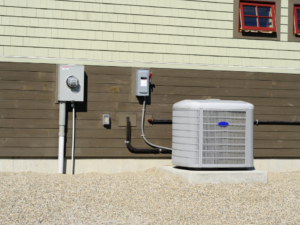
The next step in AC installation is connecting the power source and wiring your new AC system correctly. Professional help may be needed if you don’t feel comfortable with electrical wiring tasks; however, there are many DIY tutorials available online that might provide enough guidance for those who would like to try it themselves. Wiring diagrams included with your AC kit should provide helpful guidance throughout this process as well.
And finally, once all components have been properly wired and secured, it’s time for a test run! This includes checking all aspects of operation such as cooling consistency, temperature regulation accuracy, fan speed settings etc., so that everything functions properly before use. The most important thing during this process is that all safety protocols must be followed closely – never attempt any home repairs while working on an electrical appliance!
With these few simple steps taken into consideration during AC installation, anyone can successfully complete their own AC project without worry or hassle!
AC Installation Process: Step by Step Instructions
First Step
The first step in AC installation is to select the right AC unit for your space. You should take into consideration the size of your room, how much cooling power you need, and other features such as energy efficiency rating and noise level when choosing an AC unit. It’s important to get one that is powerful enough to cool your space properly but also efficient enough not too cost you too much money on electricity bills each month. Once you have selected the right AC unit for your space, it’s time to move onto installing it correctly.
To install an AC unit correctly, start by measuring out where it needs to go and then mark these measurements clearly on the wall or floor where needed before drilling holes in those areas.
Second Step
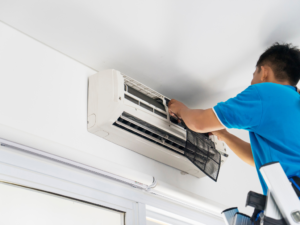
The next step in AC installation is to prepare the AC unit for installation. This includes checking the AC unit for any damage or potential issues, as well as inspecting it for any missing parts. Once you have verified that the AC unit is in good condition, you can start to fit it into place. Depending on your AC unit, there may be a few extra steps such as securing mounting brackets or attaching an exhaust pipe before putting the AC unit into place.
Once the AC unit is securely in place, you will need to connect it to power and test it out. Start by connecting its power cord to a suitable wall outlet and turning on the power switch. Check that all its electrical components are working properly and that it is receiving the right amount of electricity before moving onto testing its performance. To do this you will need to turn on both the AC unit’s cooling functions and its fan speed settings and adjust them accordingly until you find one that suits your needs best.
Final Step
Finally, once your AC installation is complete and everything has been tested and checked thoroughly, you should take a few extra precautions to ensure that your AC system runs smoothly in future. These include regularly changing air filters, replacing old parts when necessary, keeping vents clear from obstructions such as furniture or other items, and scheduling regular maintenance sessions with an experienced technician who can inspect your AC system for any potential issues or damages. By following these simple steps regularly over time you should be able to enjoy reliable cooling all year round without having to worry about potentially costly repairs down the line.
Essential Considerations When Installing an AC Unit
Installing an AC unit is a complex process that requires careful consideration and attention to detail. Before beginning the installation process, it is important to become familiar with any relevant safety protocols and regulations that need to be followed in your area. Additionally, you should make sure that all the necessary tools and supplies are on hand for the job, such as screwdrivers, drill bits, wire strippers, electrical tape and so on.
Another essential consideration when installing an AC unit is proper ventilation. This can vary depending on the AC model you have chosen but in general there must be at least 6 inches of clearance between the AC unit and any walls or other hindrances. Additionally, make sure that none of the AC’s air intakes or exhaust vents are blocked or obstructed by furniture or other objects as this can lead to inefficient cooling performance or even an AC malfunction due to overheating.
When wiring up an AC unit, it is essential to pay attention to both polarity and voltage levels; incorrect connections could cause damage to both the AC and your home’s electrical system. If wires need to be cut or new ones added during the installation process then they must be properly reattached using crimp connectors or twist-on wire connectors before being connected back into place. Additionally, always make sure that your AC is securely fastened onto a wall mount – never leave it sitting loose on a floor surface!
Finally, it’s important not to underestimate how much energy AC units can consume when in use. Make sure you factor this into your electricity bills by selecting one with a high efficiency rating – this will ensure that you won’t end up paying more than necessary each month for your cooling needs! All of these considerations are essential when installing an AC unit in order for everything to run smoothly.”
Conclusion
AC installation is a complex process that requires careful consideration and attention to detail. From safety protocols, tools, supplies and AC model selection to proper ventilation considerations, wiring connections, secure fastening of the AC unit onto a wall mount as well as energy efficiency ratings – all these factors should be taken into account when installing an AC unit in order for everything to run smoothly. With the right research and preparation beforehand, you can ensure your AC will provide reliable cooling for many years to come!